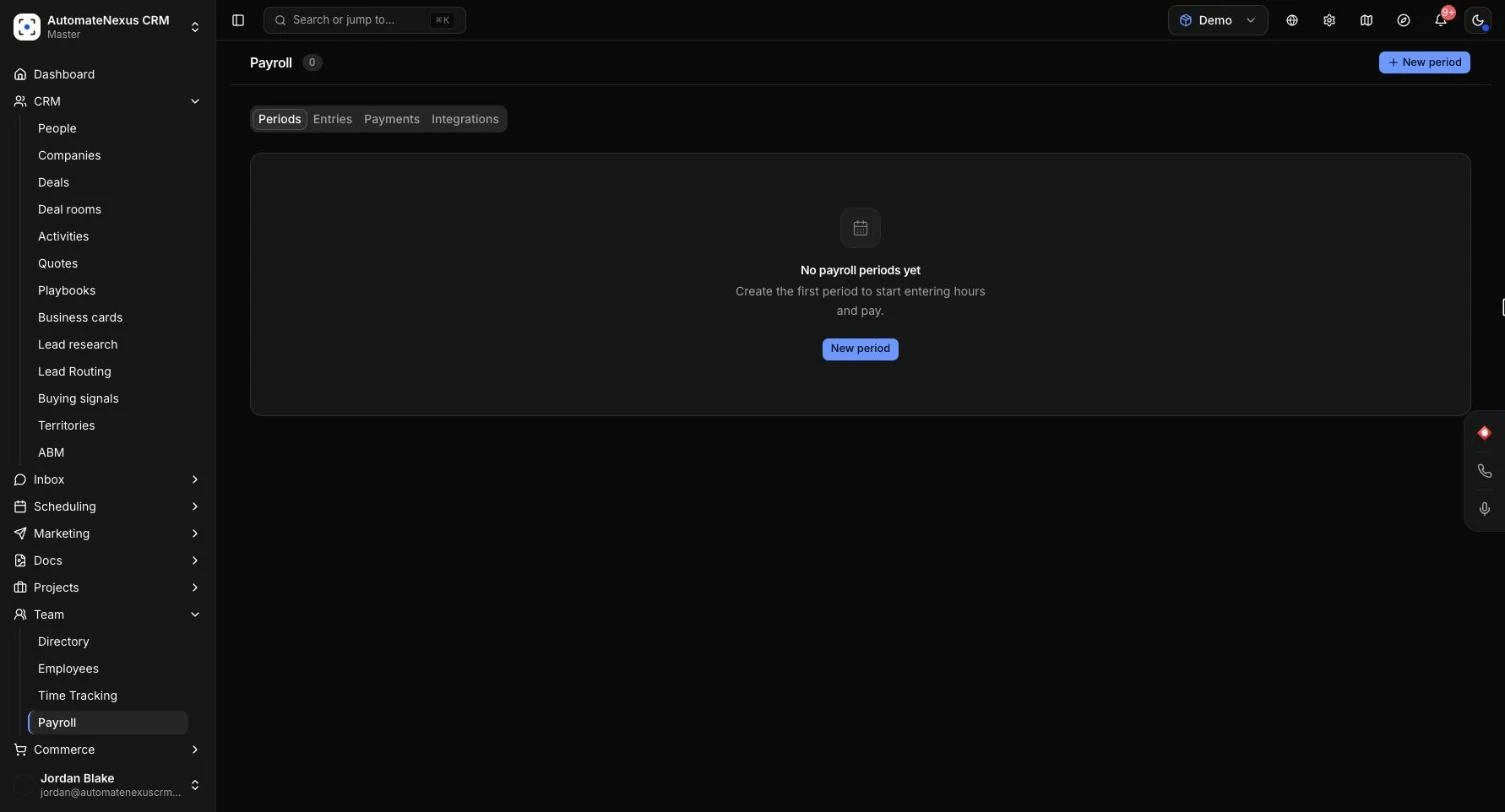
The Payroll page in AutomateNexus CRM keeps your pay runs next to your team: a pay period for each run, an entry with hours, pay and deductions for each person, a record of how the net pay went out, and connections to the payroll provider you already use. It is for owners, admins and anyone whose role has the Manage people & payroll permission. Setting up your first period takes about ten minutes once your employees have a salary or hourly rate on file.
AutomateNexus CRM does not run payroll itself. It does not work out tax withholding, file taxes or move money. You enter the deductions, pay your people through your bank or payroll provider, and record it here. If you use Gusto, ADP, Paychex, Rippling, BambooHR, Workday or QuickBooks Payroll, you can send each period's hours there and run the payroll in that provider.
Before You Start#
- Access: you need to be an Owner or Admin, or have a role with Manage people & payroll switched on under Administration → Access → Roles and permissions. Connecting or disconnecting a payroll provider takes an Owner or Admin.
- Module: Payroll is part of the Quotes & invoicing module. If you can't find it in the sidebar, check that the module is on under Settings → Modules.
- Employees: add your people under Team → Employees with the status active and either a salary or an hourly rate. Employees with neither are skipped when entries are added.
Opening Payroll#
- In the sidebar, open Team → Payroll.
- The page has four tabs: Periods, Entries, Payments and Integrations.
Without access you see Payroll is private instead, with a note to ask an admin. The tab and the period you choose are kept in the page address, so a refresh or a shared link opens the same place.
Create a Pay Period#
A pay period is one pay run: the days it covers and the day people are paid.
- Click New period at the top of the page. The New payroll period dialog opens.
- Under How often you pay, choose Weekly, Every two weeks, Twice a month, Monthly or Custom / one-off.
- Pick the Start date. For every choice except Custom, the End date and Pay date fill in for you: weekly runs 7 days, every two weeks runs 14 days, twice a month runs to the 15th or from the 16th to the end of the month, and monthly runs to the day before the same date next month. The pay date is 3 days after the period ends. Choose Custom / one-off to set both dates yourself.
- Leave Status on Draft, or choose Approved if the period is already signed off.
- Check the Period name. A preset names it for you, for example "Weekly payroll, Oct 1, 2026 to Oct 7, 2026"; type your own if you prefer.
- Click Create period. Reset clears the form.
If the days overlap another period that is not cancelled, a warning names it and says people could be paid twice for the same days. You can still save it.
The Periods tab lists every period, newest first, with its dates, pay date, status and when it was created. Click a period to open its entries.
Period Statuses#
A period moves from draft to approved to paid. Change it from the arrow at the end of its row on the Periods tab, or with Change status next to the period picker on the other tabs.
- Draft: hours and pay can still change. Next: Approve or Cancel period.
- Approved: approved for payment, and entries can still be changed. Next: Mark as paid, Back to draft or Cancel period.
- Paid: every entry in the period is marked as paid and the entries are locked. A paid period stays paid.
- Cancelled: the period is not paid and its entries are locked. Reopen as draft brings it back.
Marking a period paid or cancelling it asks you to confirm first. Use Mark as paid once the money has gone out.
When Payroll Needs Approval#
If an owner or admin has switched on Payroll Period under Settings → Approvals, a draft period isn't approved from Payroll. Instead:
- The period shows Needs approval before it is approved for payment. Click Send for approval there, or choose it from the arrow at the end of the period's row.
- The period shows Waiting for approval. Withdraw takes it back if something needs changing.
- An owner or admin approves it in Settings → Approvals, and the period is marked Approved. If they turn it down, you see their reason; make the changes and click Send for approval again.
From Approved, mark it paid as usual. A period can't be marked paid before it is approved.
Entries: Hours, Pay and Deductions#
Each period has one entry per employee. Open the Entries tab and choose the period in Period.
Add the Team#
- In a new period, click Add entries from employees. Later, Add missing employees adds anyone who joined since.
- An entry is added for each active employee who does not have one yet:
- Hourly staff start with 8 regular hours for every weekday (Monday to Friday) in the period, times their hourly rate.
- Salaried staff start with their yearly salary divided by the pay frequency: 52 for weekly, 26 for every two weeks, 24 for twice a month, 12 for monthly. A custom period gets the share of the year its days cover.
- Deductions start at zero, for you to fill in.
- A message tells you how many entries were added, how many people already had one, and how many were skipped with no salary or hourly rate on file.
Hours are not brought in from Team → Time Tracking. Each hourly entry starts from the weekday count above, so change it to the hours actually worked.
Edit an Entry#
- Open the three-dot menu on a row and click Edit entry.
- Change Regular hours and Overtime hours. For hourly staff, regular and overtime pay update as you type, with overtime at 1.5 times the hourly rate. You can still change the amounts.
- Under Pay, fill in Regular pay, Overtime pay, Holiday pay, Sick pay, Vacation pay, Bonus and Commission as needed.
- Under Deductions, enter Federal tax, State tax, Social Security, Medicare, Health insurance, Dental insurance, Vision insurance, 401(k) and Other deductions. These are the figures from your accountant or payroll provider; the CRM does not work them out.
- Gross, deductions and net pay are added up as you go. Click Save entry.
Above the table, cards show the period's total Gross pay, Deductions and Net pay, and how many people are not yet paid. Each row shows the employee, regular and overtime hours, gross, deductions, net and a Payment status such as Not paid or Paid. Once a period is paid or cancelled, the table says Locked and entries can't be changed.
Payments: Record How Pay Went Out#
The Payments tab keeps a record of how a period's net pay was paid. These buttons record what you have done with your bank or payroll provider. AutomateNexus CRM does not send ACH, wire or check payments itself.
- Open Payments and choose the period.
- Click Create batch. The dialog shows how many entries it covers and the net pay total.
- Choose the Payment method: ACH direct deposit, Wire transfer or Check, and click Create batch.
- When you have sent the payments to your bank, click Mark as sent to the bank.
- When the money has reached your people, click Mark as paid and confirm. Every entry in the period is marked paid and the period moves to Paid, which locks its entries.
The batch shows its number, method, amount, entry count and the dates it was sent and paid. If you change entries after making a batch, a note shows the new total.
Connect a Payroll Provider#
The Integrations tab has a card for each payroll provider offered: Gusto, ADP Workforce Now, Paychex Flex, Rippling, BambooHR, Workday and QuickBooks Payroll. Once connected, you link each person to their record there, bring their pay in, and send each period's hours. Owners and Admins see Connect; the card then shows the company name and how many people are linked.
Gusto and Rippling#
- Click Connect on the card.
- Sign in to Gusto or Rippling and allow the connection. You come back to the Payroll page with a Connected message.
If you install the app from Rippling instead, you land on the Payroll page with Finish connecting Rippling: click Connect Rippling to connect it to the organization you are in, and you go back to Rippling to finish.
BambooHR#
- Click Connect and enter Your BambooHR address (the part before .bamboohr.com).
- Click Continue to BambooHR and sign in as a user who can see pay, usually an admin, then allow the connection.
Paychex Flex#
- Click Connect and enter your 8-digit Paychex client number, then click Connect.
- The card shows Waiting for approval in Paychex Flex. A Paychex Flex admin opens Company Settings, Integrated Applications, finds the app, approves it and accepts the terms. Open the approval page goes there when a link is available.
- Click Check again on the card.
ADP Workforce Now#
- Click Connect, then Get the code. The card shows your account code.
- Click Open the ADP Marketplace, signed in to ADP as a Workforce Now admin. Get the app, give consent to share your data, and enter the account code when ADP asks for it.
- The card shows Connected as soon as ADP confirms. If it says it is waiting for consent, give consent under My Apps in the ADP Marketplace and click Check again.
Once ADP is connected, people your ADP admin assigns to the app in ADP become admins in the CRM, and your team can sign in with ADP. Unassigning them in ADP puts back the role they had.
Workday#
Your Workday admin makes an app login for the connection (Register API Client for Integrations, with non-expiring refresh tokens and the Staffing, Compensation and Payroll scopes). Click Connect and enter the five values they give you: Client ID, Client secret, Refresh token, Token endpoint and REST API endpoint. Workday receives hours but does not share pay.
QuickBooks Payroll#
QuickBooks Payroll uses your QuickBooks connection. Click Open Integrations on its card to connect QuickBooks under Administration → Integrations → Payments; the card then shows as connected.
Link Your Team#
- On a connected card, click Team. The Your team in list shows each person and their record in the provider.
- Click Link 3 likely matches (the number is how many it found) to link people with the same email or the same name, or pick each record under Record in.
- Click Update pay from Gusto (or your provider) and confirm. The salary or hourly rate on each linked person's profile is replaced with what the provider has, and new pay periods use it.
- For QuickBooks, use Add to QuickBooks to create the employee there, or Update in QuickBooks for someone already linked.
You can also link one person from their profile under Team → Employees, on the Custom & Payroll tab.
Send Hours to Your Payroll Provider#
Once a provider is connected and people are linked, the Payments tab shows Send hours to payroll for the chosen period, with a button for each provider.
- Choose the period and click Send to your provider, for example Send to Gusto.
- Confirm with Send hours. Each linked person's regular, overtime, holiday, sick and vacation hours from the period are sent.
- The result lists each person as Sent, Updated, Not sent or Failed, with the reason. Click Open Gusto (or your provider) when shown to finish there.
Where the hours land:
- Gusto: the next Gusto payroll that has not been run. You check and run it in Gusto.
- ADP Workforce Now: a pay data batch your payroll person processes in ADP.
- Paychex Flex: paychecks in the next unprocessed Paychex pay period. You submit the payroll in Paychex.
- Rippling: the next Rippling payroll, as earnings.
- BambooHR: BambooHR, where BambooHR Payroll takes them into the next payroll.
- Workday: payroll input for the period, which your payroll team completes in Workday.
- QuickBooks Payroll: regular hours only, as time entries, which QuickBooks Payroll uses when you pay from timesheets.
Sending again later changes what was sent. Hours can't be sent from a paid or cancelled period: send them before you mark the period paid.
Disconnect a Provider#
On a connected card, an Owner or Admin clicks Disconnect and confirms. Nothing is read from the provider or sent to it any more, and your team's links to it are removed. Hours already sent stay in the provider.
Tips#
Troubleshooting#
"Payroll is private"#
Your role does not have Manage people & payroll. Ask an Owner or Admin to add it to your role under Administration → Access → Roles and permissions. A change that is refused says "Payroll changes take the Manage people & payroll permission. Ask an admin."
Some employees were skipped#
The message says they have "no salary or hourly rate on file". Add one on their employee profile, or bring it in with Update pay from, then click Add missing employees. Only active employees get entries.
I can't edit an entry#
The period is paid or cancelled, so its entries are locked. Reopen a cancelled period with Reopen as draft. If saving is blocked, check for "Some fields are not amounts of zero or more" or "Deductions are larger than gross pay."
There is no Approve option#
Approval is switched on for payroll periods, so a draft shows Send for approval instead. An owner or admin approves it in Settings → Approvals. While it waits, the only option is Cancel period; use Withdraw on the period to change it first.
Someone shows "Not sent"#
The reason is listed next to them: "Not linked" means you need to link them under Team on the provider's card; "No hours in this period" means their entry has no hours; "Already sent, and unchanged since" means nothing new to send.
A card says Reconnect#
The provider no longer accepts the connection. An Owner or Admin clicks Reconnect and goes through the connection steps again.
Related Articles#
- User Roles & Permissions: give people the Manage people & payroll permission.
- Tasks, Delegation & Time Tracking: track time on tasks and projects.
- Integrations & Marketplace: connect QuickBooks and your other tools.